Monday, December 17, 2012

2012 Christmas Roundup

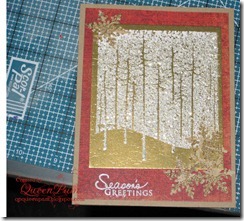
I think by now you can tell I love Christmas. Here are some more cards and videos showing the cards I made

HO3 Card

20121123_14165320121123_141738

Same Image another way

20121125_184429


Joy Card


20121125_184358


other Poinsettia die


20121122_115418

Inside20121122_115447


Cut on my Zing with a Silhouette File: 20121122_115226


Nativity die from Taylored Expressions20121122_115537


OOO I had Fun!


In the Hands of the Creator,


QP

Poinsettia Christmas Cards

I had a play night Saturday and I got stuck on one die  and made 3 different cards using it.IMG_2297

The die is Tim Holtz Tattered Poinsettia and what is so cool is that there is a matching embossing folder for it. I actually have another poinsettia die that embosses when it cuts but not with this much detail.

IMG_2292

There are 3 sizes of flowers on the die and I joined them with a tree brad I had. I topped the brad with glitter as there had to be bling right!

IMG_2293 

I colored the die cuts with Stampin Up’s Cherry Cobbler and  Mellow Moss Inks.

IMG_2290

The other embossing folder that came in the set was used to emboss the background and a Hero Arts stamp completes the outside of the card.


IMG_2294

I used the same inks on this card but with a lighter hand.


And one with no color at all! The embossed border comes from a Spellbinders Card Creator die.


IMG_2296


It was a fun night!


In the Hands of the Creator,


QP

Sunday, November 18, 2012

Becoming a Great Stamper

Video with this Info

Tips to Become a Great Stamper

  • 1. Use quality products. There is something to be said for getting what you pay for. And in stamping great results come from great products plus practice.
  • 2. Inks from Tsukineko, Ranger; Colorbox are all great.
      • a. My go to ink pad for general stamping is a Versafine Onyx black; for Copics Memento Tuxedo Black both Tsukineko products. But I have all the Paper Trey Ink and Stamping Up for the color range. I have over 670 ink pads and these are the ones I use the most. Why so many for one there are specialty inks and they have a place. Pigment, Chalk; Dye; Permanent Dye etc.
      • b. In Chalk ink I use the fluid chalks more than the versamagic. My favorite permanent inks are Ancient Page because of the color range.
      • c. Make color sample of your inks so you can compare colors.
  • 3. Paper: SU; Paper Trey Ink, MFT all great papers. For my card bases I general y use Cougar Opaque (just cause I can get it by the ream for much less that any of those others that I have mentioned). A great card base makes a great card. Your base has to be sturdy. Please no 65# CS for your base. I consider 65# for layering only. You won’t find any 65# bases at Hallmark.
      • a. Use a paper trimmer that cuts straight and clean and keep spare blades. My go to is a Genesis from Bonnie’s best but at 16 inches that does not travel well. So I keep a Tonic guillotine in my to go bag. I can cut a sliver with either of these cutters. I also have a Fiskars slide type for those occasions where I want to stop or start cutting in the middle of my paper.
  • 4. Make sure your stamping is clean and crisp. If you miss stamp, fix it if you can, embellish over it or DISCARD IT.To get great results stamping you need some sort of foam pad underneath the paper you are stamping on. Mouse pads work even layers of fun foam. Cover the foam with some typing/copier paper scrap (this protects the foam from absorbing stray ink). The foam gives so if the stamp is uneven and often they are the foam compensates for this.
      • a. Ink your stamp thoroughly, look at the stamp surface and make sure it looks wet. Test a new stamp on scrap.
      • b. Press the stamp to the paper and don’t rock or twist. Walk you hand over the backs of large stamps to make sure that all parts of the stamp have kissed the paper. (You can take paper to stamp instead for large stamps and them cover the paper with scrap and use a brayer or walk your hand over the back of a scrap paper. Then let the stamp REST momentarily on the paper so that it can transfer the ink and so the paper has time to absorb the ink.
      • c. Use a stamp positioner. Stamp A Jig is one, this makes sure your stamps are where you want them and on the paper straight. Especially useful for sentiments.
  • 5. Adhesives. Keep a variety of them both wet and dry. My favorite wet is 3M Scotch Quick Dry and for heavy items Glossy Accents. Dry ATG. Dot N Go Glue Dots in several styles.
  • 6. You need a variety of great scissors. Detail ones with a very sharp tip. I use EK Success Honey Bee pair because they are non-stick and they cut well. I have a pair by Fiskars but I think the EK Success cut better. I have some titanium general scissors that I got in a multipack at Sam's that have been cutting for 10 years well and true.

In the Hands of the Creator

qp-signature_thumb

Monday, October 22, 2012

LnL

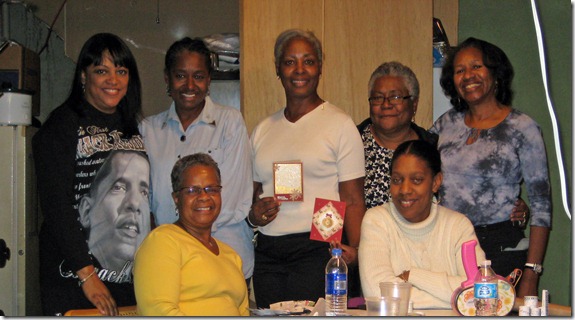
LnL does it mean Laughing and Loving. It could, because we did. But it means Late-Nite in Louisville. My friends from the Cincinnati Based Late-Night Stamper group came and spent the day with me on Saturday and I was so blessed by their presence.


They entered into my craft area with Christmas music playing as the majority of the crafts we were to make where Christmas themed.  I started the day by introducing them to my new Pet Dog Bling.

IMG_2275


They thought I had gotten a dog. LOL! I created him during a resin/mold class but he was not made with either one. He is made out of sculpy clay and different kinds of glitter. I may have found a new talent….not.

IMG_2276


I donned my Tiara, then we opened with prayer. Ms. Wanda is a praying woman, yes sir; bless God; and once covered by the blood of Jesus we got down to crafti-goodness.

015016


First we made a bottle station and matching designer clothes pins.

IMG_2274


It is made out of PVC pipe coupling and designer paper. It is held together with hot glue. The paper is adhered with gel medium. Above is the sample I have been using for a couple of months. It comes in handy keeping your glue bottles upside down so that the glue is ready when you are.

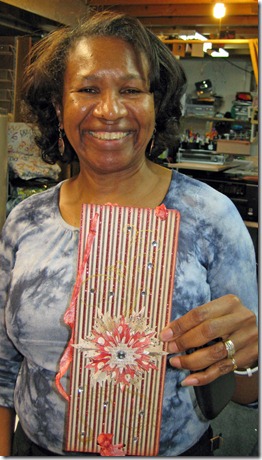
Ms. WandaIMG_2255
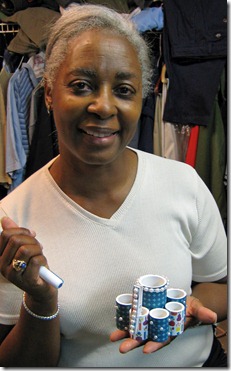
Ms. RubyIMG_2256(she is just so cute!)


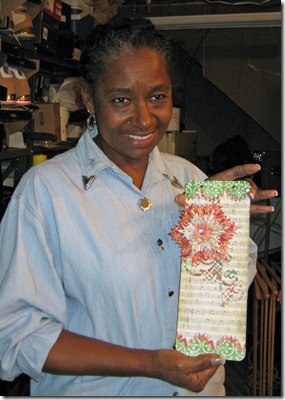
Then we got started making Christmas Door Knob Hangers.


this is the sample:

IMG_2264

Ms. BonnieIMG_2253


Ms. RenaIMG_2254


Ms. MaryIMG_2257(Free Range Chicken I’m still laughing that’s a story Mary told us)


This is my work in process. Its hard to teach and create at the same time.IMG_2265

I used the Tim Holtz holiday rosette to create the embellishment and there is a trick to getting 2 different sizes out of one size die. See my YouTube video for details.


Then we had to eat; crafting is hard work. My hubby, wonderful chef that he is made Chicken Salad and I made Brundage Soup ( I named the recipe after the friend who came up with it). The Ladies brought salad, brownies, two kinds of cookies and chocolate cake. I had some Klondike bars and oh the things they did for those bars. All that put Ms. Vickie to sleep!. Here are the other cards we made.

Ms. VickyIMG_2261

IMG_2266IMG_2267IMG_2268

It was getting late so I sent them home with the supplies to make this card. That’s my way of keeping a party going.IMG_2270


Everyone made it back home to Cincy safe and sound and I am still LNL Laughing and Loving and already planning for next year!
IMG_2260

In the hands of the creator,


QP

Saturday, October 06, 2012

World Card Making Day 2012

Just a quick post to celebrate World Card Making Day.

I just made this card using copics. Got Copic Certified yesterday so now I must practice Practice Practice!

Picture 70


A closer look.

Picture 71

I made a video about and you can find it on my YouTube channel: Elon47 channel


I hope you get to make a card today!


In the Hands of the Creator,

QP


-

Monday, September 24, 2012

Right Now

Enjoying: I just finishing working for the day and since it was a particularly rough one I’m enjoying the fact that it is over.

Planning: I’m planning to craft some more Christmas cards for Operation Christmas/ Operation Write Home. I’ll show you some at the end of this post.

Remembering:I spent Friday night crafting and I’m remembering how good it is to play with others.

Praising: I’m giving God praise for all the many blessings He alone has given me. A great Husband, 2 adult children who are doing well; a grand Girl who really is grand; a job, and for having ENOUGH. Hallelujah!

I’m on a CAS (clean and simple) kick
IMG_2246

IMG_2245

IMG_2249

Procrastinating: I must finish a swap that is due on the 30th. I have most of the pieces complete; just not the whole. I don’t like how its turning out. I keep hoping that some bright idea will make it all fall into place.

In the Hands of the Creator,

QP

Monday, August 27, 2012

Losses

A couple of Friends suffered the loss of a parent. Another friend has decided not to attend our crafting nights anymore. It just seems to be a season of loss. So I made some cards for my friends.

First up the sympathy cards. I was playing with a technique I learned while visiting home from Rena (Hi Rena)! The stamps, ink and paper are all from Paper Trey Ink.
IMAG0239


The paper on this one is kraft from Paper Trey Ink and colored with Prismacolors.
The ink was Archival. Stamps by Hero Arts except for the sentiment it is from
Cornish Heritage Farms. Someone so wonderful… can never be forgotten is what the full stamp says. I stamped a portion on the front and the rest inside. Added a few pearls to finish it off.
IMG_2225


These three cards were inspired by a die set I bought from Paper Trey Ink.
there are 3 dies in the set as seen below. The stamps are from their Counting Your Blessings stamp set. I had this floral ribbon that covers the seam between where the embossing folder ends. I think it is a hello kitty set from Sizzix.
20120826_202048

20120826_202057

20120826_202118

Even though this seems to be a season of loss; I am blessed and grateful, thankful for what I have.
In The Hand of the Creator,
qp signature